A virtual Windows root server is not equipped with its own sound card. This is because you usually don’t need speakers on the server in the data center. But that doesn’t mean you can’t have sound on your Windows server!
You can set the sound to be played on the server to be forwarded to your local device. This is a setting in the Remote Desktop Connection program from Microsoft.
To be able to listen to sound via Remote Desktop, a few steps are necessary.
Enable sound in Remote Desktop settings
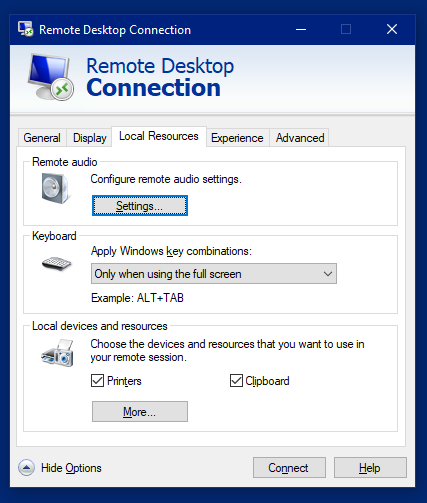
Open the Remote Desktop Connection program on your local computer and enter the IP address of your Windows server. Then click on „Show options“ at the bottom.
Then navigate to the „Local Resources“ tab. Here you can perform various settings, such as the transfer of drives, USB sticks and printers in your network.

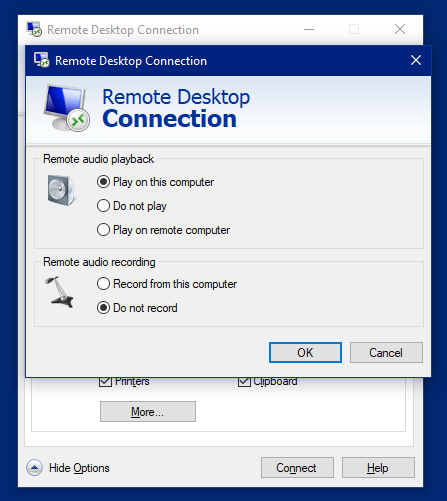
But in this case we are interested in the „Remote Audio“ option. Click on the „Settings“ button. A new dialog opens in which the options can be set.

Select the first entry for „Remote audio playback„. This is „Play on this computer„. Then click OK to save the setting.
Now connect to your Windows server as usual. You may need to make some settings there.

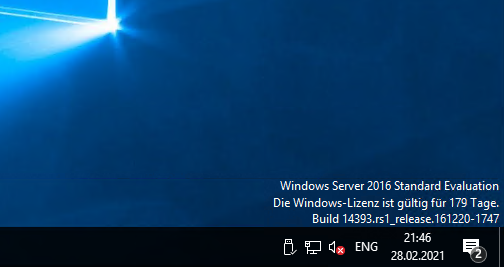
Usually, the Windows Audio service is disabled. This is because Windows could not detect audio output during installation. However, this service can be activated very easily.
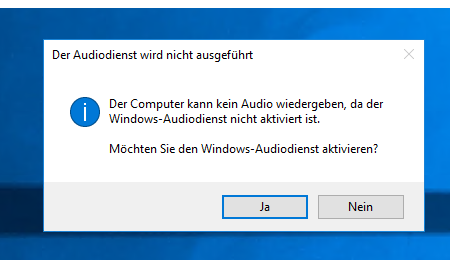
Right-click on the icon with the round red cross and select „Output devices„. A new dialog opens.

Confirm this dialog with „Yes“ to activate the Windows Audio service.
Your Windows server can now play audio/sound/sound.
Check this, for example, by briefly watching a YouTube video. You should then be able to hear the sound on your headphones.
If this does not work, please contact us in support. We will be happy to help you.
