In this article we will show you step by step how to expand the hard disk of a Windows server.
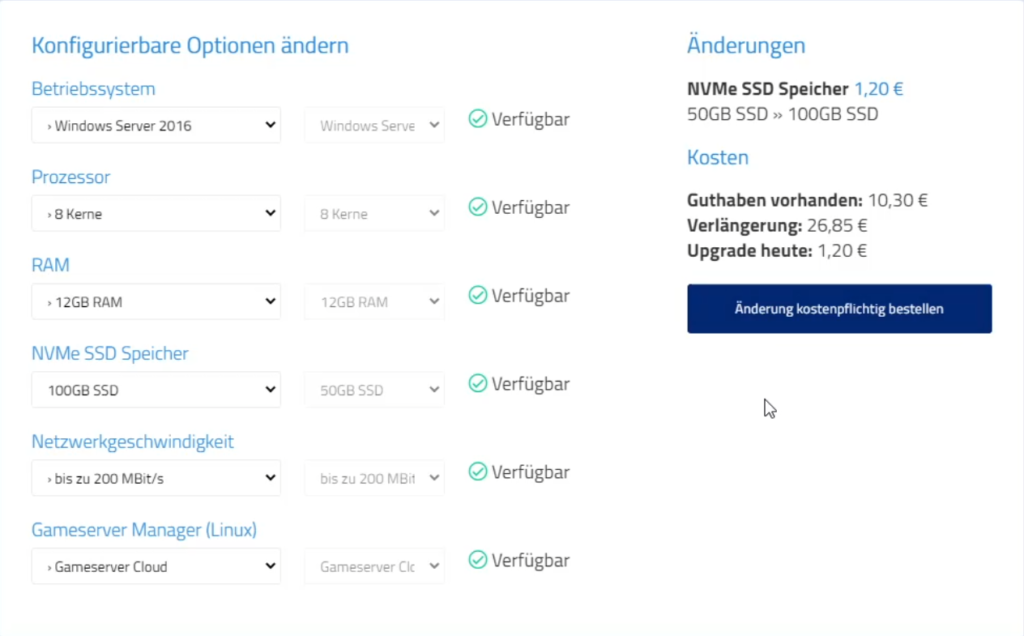
To be able to expand your hard disk, you first need „unallocated space„. So open the upgrade/downgrade form of your Windows server. Then select a hard disk upgrade.
Upgrade durchführen

Order the desired configuration by clicking on „Order change with costs„.
Restart Windows Server
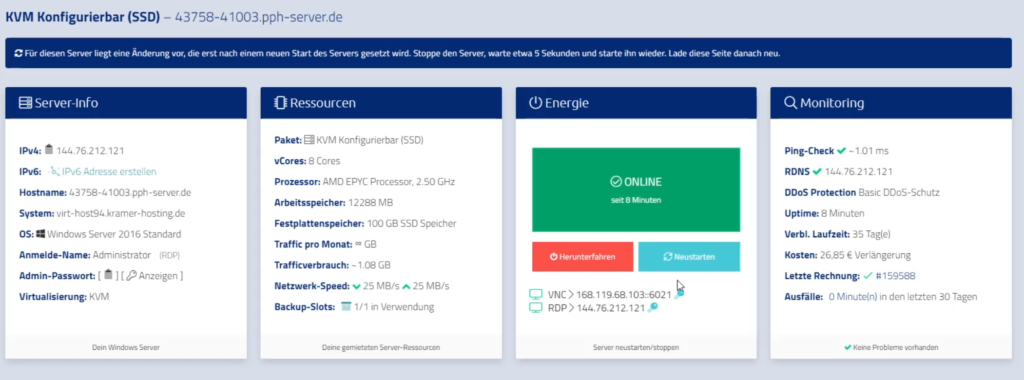
After that, go back to the Cloud Manager. Wait for about 1-2 minutes. You should see a message stating that changes are coming for the server. Perform a restart of the server.

Manually expand hard disk
After a reboot (this may take a while, please wait patiently) connect to your Windows server via Remotedesktop.

After you have logged in to the server, you can view your C: drive. It still has the same size as before. This is because we do not allocate the additional space ordered to a partition. You have to do that yourself.

Click the Start button and search for „Partition„. You should get a program suggested. Open it. If the program is not displayed, you can also type „diskmgmt.msc„. This is guaranteed to work!

Maximize the window that opens best. Wait until the content is loaded. You should now find a black colored block. This is the unallocated memory.

You now have several options to use this space. You can create a new partition from the unallocated space or append the space to C:. The latter is the most popular approach.
Right click on the blue colored area with the drive letter C:. In the context menu that opens, select „Extend volume„.

A dialog opens. It is sufficient to click on „Next“ in this wizard and on „Finish“ in the last step. The free memory space is automatically made as an extension.

The changes are now applied live. The process does not take long. The black colored unallocated area should now disappear and be merged with C:.
Hard disk expansion performed
Validate the result in Explorer by looking at the size of the disk.

The operation is completed. The hard disk space has been increased.
If something is different during this process or if you have any problems, please contact our support at any time. We are happy to help!
